Architectural Digest Feature: How to Repot a Plant Without Killing It
By Raimondi Horticultural Group, Inc
The original article on Architectural Digest: How to Repot a Plant Without Killing It. Click Here
How to Repot a Plant Without Killing It
Don’t wait until your houseplants are root-bound in a tiny planter
By: Terri Williams
September 7, 2022
Whether you have a green thumb or you’re a novice plant parent, if you grow greenery to enhance your interiors, you’ll have to learn how to repot a plant at some point. According to Tyler Banken—indoor-outdoor plant expert and landscape architect at Neverland, an online plant care community—the majority of potted plants will need to be repotted at least once in their lifetime. The process is the same for indoor and outdoor plants.
Repotting is not difficult, but how you proceed can either help a houseplant grow or stunt it. Here, experts give tips on the best way to repot plants and how to care for them in their new pot.
When should you repot a plant?
“People believe that a plant must be repotted immediately upon bringing it home, and this practice couldn’t be further from the truth,” says Christopher S. Raimondi, CEO and president of Raimondi Horticultural Group in Ho-Ho-Kus, New Jersey.
The first step in properly repotting your plant is deciding if it’s actually time to repot. “A plant only needs to be repotted when it indicates that it’s struggling,” he explains. “Its growth is slowed and the roots are overcrowded.” Also, check to see if the internodal leaf space is shortening—this means the leaves are closer together. Before you grab a new container, consider this: Plant health could be linked to soil and improper fertilization.
A surefire sign that a plant is ready for a larger home is visible roots—either at the top of the soil or through the pot’s drainage hole, notes Lindsay Pangborn, Bloomscape’s gardening expert. You can also check by gently removing the root ball from the pot. “If roots are growing in circles around the outside, this means it’s root-bound, and it’s time to bump up a pot size,” she says.
Another way to know whether you need to repot is to check the water flows when you’re watering. “As a plant grows, the soil slowly breaks down, and the roots take up more space,” Pangborn says. She adds that a healthy root ball has plenty of soil surrounding the roots, which will absorb and hold on to moisture. On the other hand, a root-bound plant no longer has enough soil to retain moisture, and water flows immediately through the pot.
If it is truly time to repot your plant, these are the steps to follow:
Step 1: Select the right pot
You’ll first need to ensure that the new pot is the proper size. Raimondi says the container should only be one sizer larger than the current pot. “This means if the plant is in a 4-inch pot select a 5-inch new container,” he says. If the pot is too large, Raimondi warns that it will cause more issues, such as root rot. “Excessive soil will prevent the soil from ever drying out, hence, rotting the roots.”
Then, decide on the best container material to match your plant and care routine. “Terra-cotta pots dry out more quickly thanks to their porous nature, so this material is recommended for plant parents who err on the side of watering too frequently,” Pangborn says. They’re also great for desert plants that prefer to be on the arid side, like cacti and succulents. On the other hand, Pangborn recommends plastic pots for people who may occasionally forget to water the plant, since plastic pots tend to retain moisture better. “They’re also great for tropical plants that don’t do well when their soil dries out between watering, like prayer plants or bird of paradise.” For the in-between container, consider concrete, which isn’t as porous as earthenware, but it still offers breathability.
No matter which pot you choose, it’s always a good idea to chose one with drainage holes. “If a pot does not have drainage holes, it may lead to overwatering or root rot, which can lead to eventual plant death,” Pangborn warns. She says drainage holes are essential for plants to thrive. “The ability for a pot to drain means that you can water deeply without fear of excess water collecting, which can lead to root rot.”
It’s also helpful to have a saucer underneath the new container to catch excess water. “This will protect furniture from moisture damage,” Pangborn says. However, if your outdoor planters will be subject to rainfall, then skip the saucers, and let the water drain out onto the ground beneath.
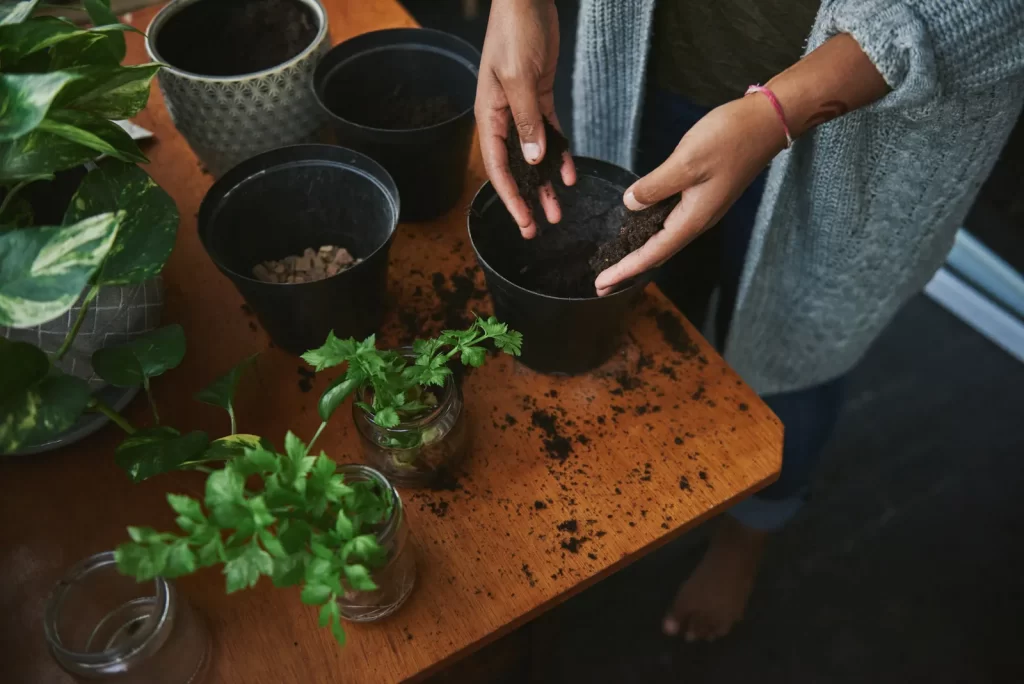
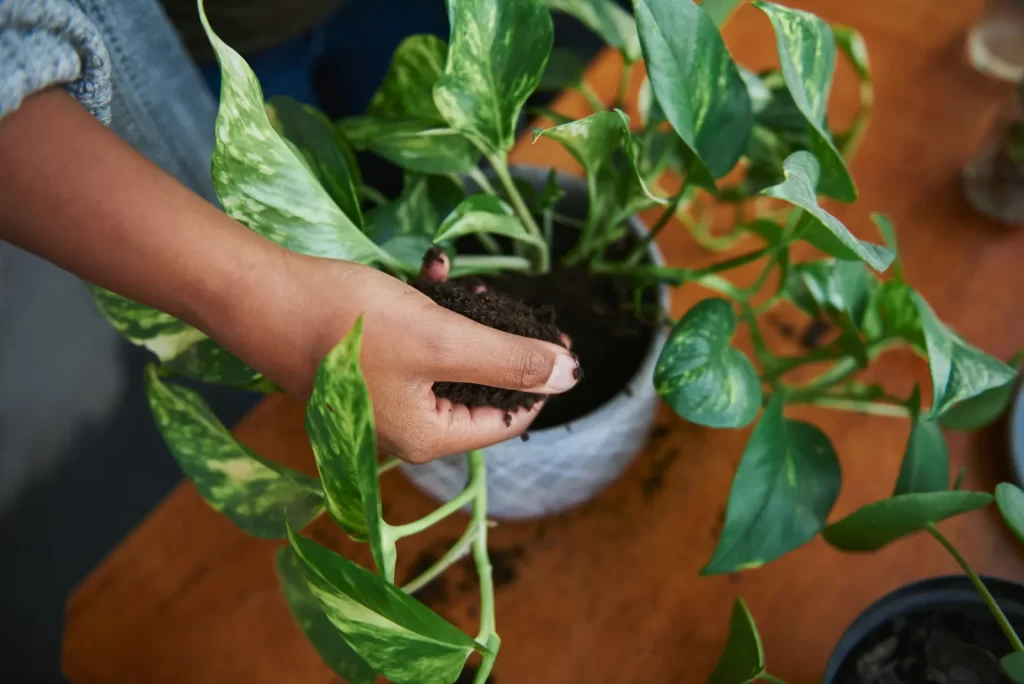
Step 2: Select the right soil
When selecting soil, Raimondi says it needs to contain three materials in roughly equal amounts: peat moss (or in some cases coir), sand, and perlite. “These materials provide organics, drainage, and very important aeration,” he says. “Together they provide suitable anchorage for the new roots.” If you’re buying pre-made potting soil, he advises reading the label to ensure that the above materials are ingredients. “Please refrain from compost or top soil mixes, as these may not be sterilized and contain insect eggs and pathogens.” Pangborn also says it’s fine to get a general purpose potting mix, but for plants that like to dry out between watering like cacti or orchids, she says you’ll want to use a chunkier and faster draining mix. “For any plants grown in a container, it’s important to avoid garden soil or topsoil, which is too heavy and dense for container growing.”
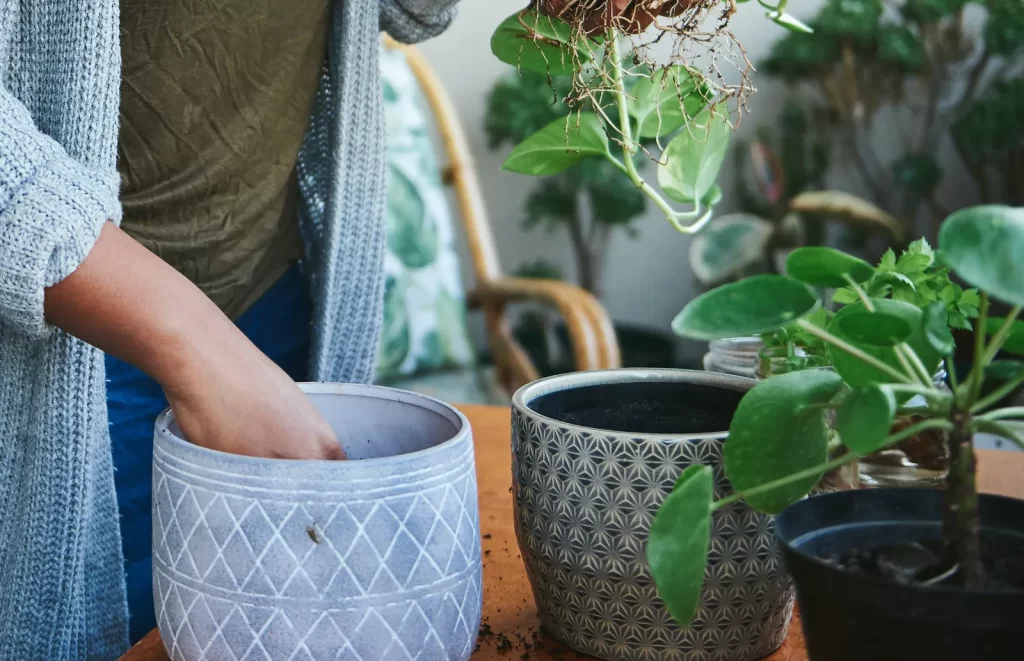
Step 3: Prep the new pot
Once you have the new container and the potting soil, place everything on a flat surface. Note that there may be some excess dirt, so if you’re worried about a mess, put a plastic sheet or an old towel underneath. Gardening gloves and a small garden trough will make repotting easier.
For a pot that lacks drainage holes, you’ll want to make sure to minimize sitting water and root rot. To help mitigate any sitting water add broken pottery to the base of the plant prior to potting. It’s an old process, but Raimondi says it’s a good practice. “This keeps the drain water away from the sensitive root hairs that pick up and transport the moisture to the plant leaves, although you can also use gravel, perlite, or Styrofoam.” Raimondi also notes that excess water should be removed after approximately one hour.
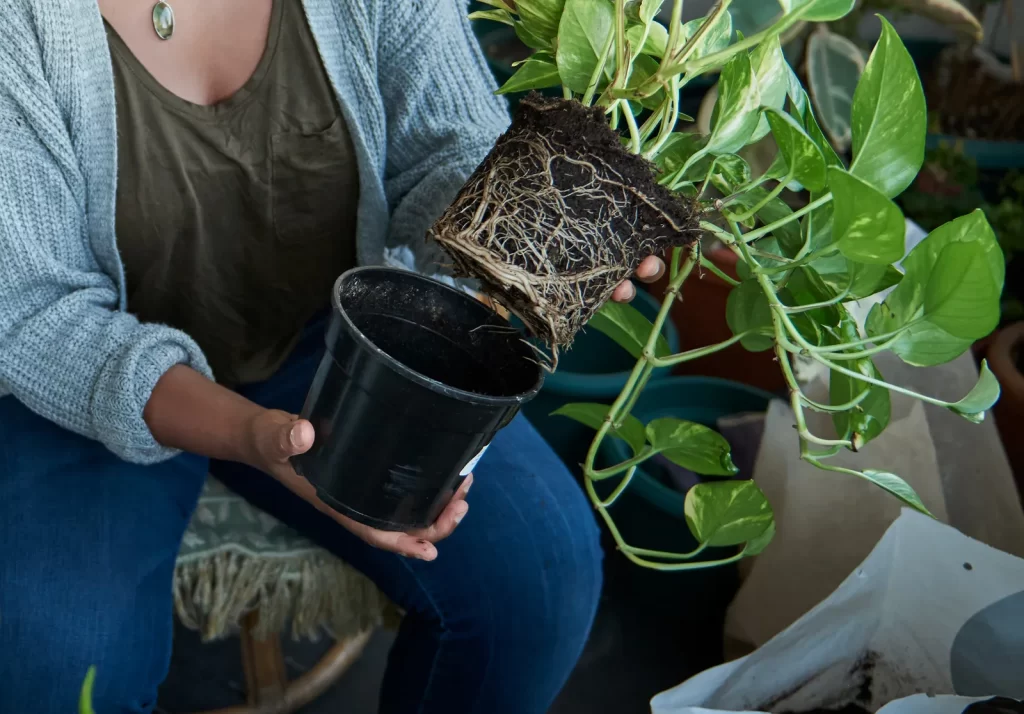
Step 4: Remove the plant from its original container
Now, you’re ready to remove your plant from its existing home. If it’s in a plastic pot, Tyler Banken recommends squeezing the pot to help loosen the plant. “If you have a garden tool on hand [or even a kitchen utensil], use it to loosen the soil of the plant, starting at the top and working your way around the pot.” Gently work the garden tool along the inside of the pot until you can lift the plant out. This can be tricky if a plant has ample roots, like a pothos. “Sometimes it may help to place the plant on its side on a table so you can lift the plant from its stem base and gently work the roots if they’re tangled in drainage holes.” Once it’s fully loosened, Banken says you should slowly slide the plant out of its pot.
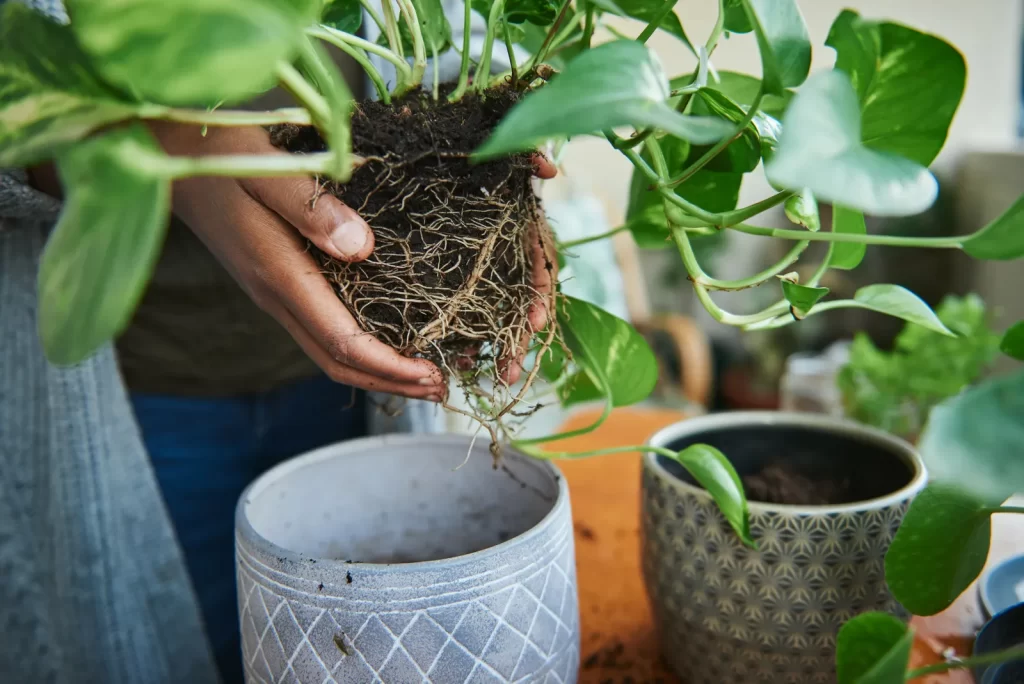
Step 5: Free the roots
After removing the plant from the pot, Banken says you need to show those cramped roots some love. “With the plant laid on its side, gently work your hands through the roots to loosen and untangle them.” He recommends starting at the bottom of the plant and working your way up and around to prepare the plant for its new home with more water, air, and nutrients. “A few roots may disconnect from the plant, and that’s okay, but do your best to not fully remove the roots.”
If the root balls are healthy, Pangborn says they don’t need any extra work. She also advises to disturb the roots as little as possible. “If the roots are unhealthy or extremely overgrown, snip out any dead, discolored, or extra long roots, and make sure to disinfect the blades each cut to avoid spreading potential infections or bacteria.”
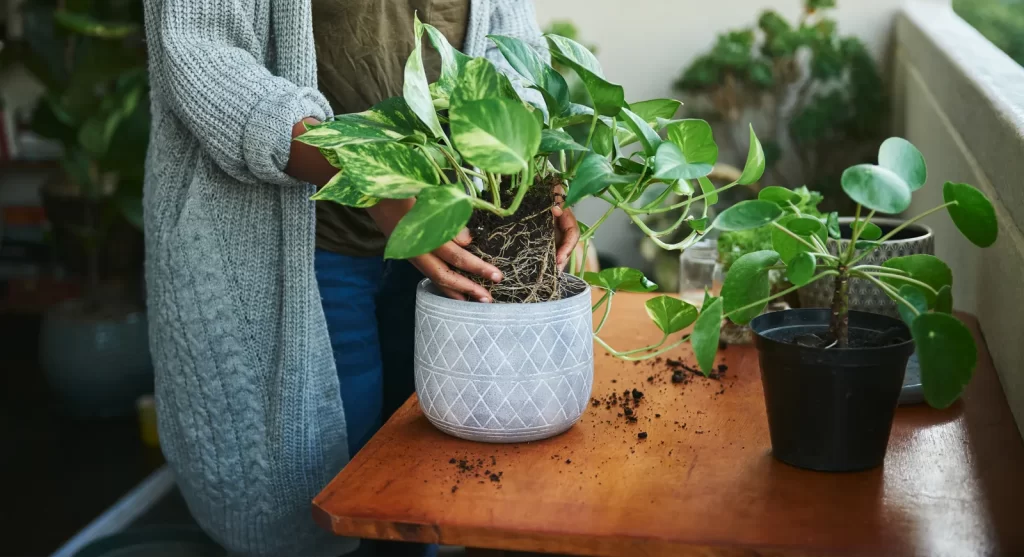
Step 6: Place the plant in the new pot
Fill about one third of the new pot with fresh potting soil. “Place the plant into the center of the container, making sure the top of the root ball is about one inch below the top of the pot,” Pangborn says. Adjust the bottom soil mix until you reach this level. “Backfill around the sides of the root ball with potting soil, slightly tamping it down to ensure soil fills completely around the roots.” To ensure that the soil is settled and all the gaps are filled, Banken recommends tapping the sides of the pot with your hands. This will gently compact the top of the soil and allow the plant to sit sturdily in its new home.
Step 7: Add plenty of water
The final step is also crucially important. “Soak your plant thoroughly until water is running out of its drainage holes, then soak it again,” Banken says. “If your pot is draining in a saucer, let it sit in the excess water for 20–30 minutes to give it a chance to get a good drink, then dump the excess.” A deep and gentle watering is so crucial because it helps to relieve the stress of repotting, and helps the soil to settle in its new home.
Step 8: Grow healthy plants
Although it’s good to drench your plant once you repot, you don’t want to continue the habit day after day. Overwatering is about the frequency of watering, not the amount of water. “When plants are watered too frequently, their roots don’t receive enough oxygen and stop functioning, which is why the signs of overwatering are so similar to those of underwatering,” Pangborn says. As a general rule, Banken notes that a plant needs a drink if the top two inches of soil are dry [stick your finger into the soil to test]. When it doubt, it’s better to underwater your houseplants than overwater them. Plants like succulents and snake plants actually do well with dry potting soil.
You can also maintain the health of your houseplant by pruning. “It’s a practice that can tidy and shape a plant, encourage growth, and even lessen the chance for pests and disease,” Pangborn explains. “But never remove more than 25% of the plant’s green growth at once.” Always use a clean sharp cutting tool and clean between cuts to avoid spreading disease. With proper pruning, an indoor plant may be able to stay in its container for years, Raimondi adds.
The original article was published on September 7th, 2022 in Architectural Digest. Written by Terri Williams you can check out the original article here.
Creating healthier office spaces filled with happier people is a challenge faced by property managers and business owners alike. Competition to sell or rent office space is comparable to the daily job bosses face vying to hire the most talented employees. We’ve shared with you the value of living walls and the numerous health benefits […]
Give your employees something to celebrate with a holiday display that will bring joy to their hearts. A 40-hour work week can look frightfully the same from one week to the next. Why not change things up during the holidays by having a little fun with decorations and a dose of holiday spirit. Holiday decorations […]
Throughout hotels in Europe and Asia, and especially in countries like Holland and Japan, indoor landscaping is as common as tulips and chopsticks, because the cultural and social relevance is embedded in their way of life. […]